A cautionary tale of an attempt to build a fume extractor and filter out of cardboard and duct tape.
How Not to Build a Solder Fume Extractor
December 2006

Contents
For More on this Project
I'm publishing this in the spirit of sharing my mistakes frankly and openly, which I believe science and the culture in general could do with a lot more of. This is a cautionary tale of engineering failure, but also an example of the value of failing early and often, and of quick prototyping as a way to find out what the problems are with any particular notions you have of the right way to design something. With this project my notions were problematic in several ways at once, but I was able to untangle the resulting mess to learn some lessons that maybe will be valuable to other people too.
In 2006 I had a brand new and fairly nice temperature-controlled soldering station and a list of projects to use it on. Working on these it quickly became obvious that I needed a way of removing solder fumes from the vicinity of my face if I had any hope of tinkering and inventing in relative good health for the rest of my life. With a rough idea of what I wanted to do I had bought a few materials to build a fume extractor, but it wasn't until I found myself watching a silly episode of the SciFi-channel television series Eureka that I really started hacking in earnest.
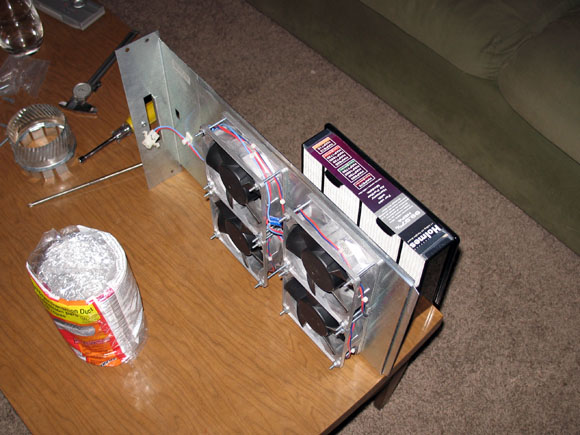
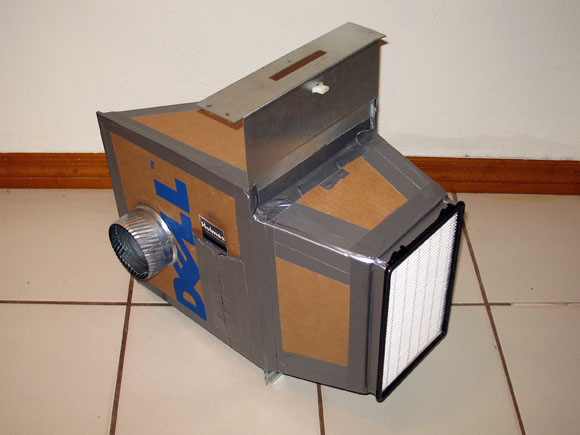
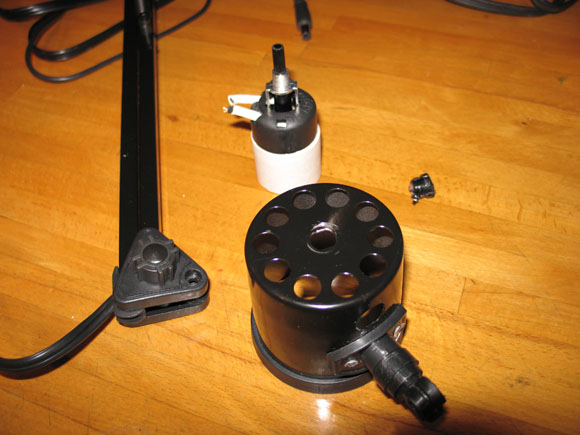
Fan assembly, HEPA filter and dryer duct
My friend Danny Morris had given me an assembly of four 12-volt DC fans on a sheet-metal tray, which I believe once cooled a photovoltaic power system. I bought the cheapest HEPA filter I could find, the cheapest swing-arm lamp I could find, and a Slinky-like foil dryer duct (not exactly cheap). I planned to position the dryer duct over the workbench by attaching one end to the swing-arm lamp. The four fans would pull fumes through the duct and out through the filter, and of course I saw nothing wrong with keeping the whole thing together using nothing more than cardboard and duct-tape.
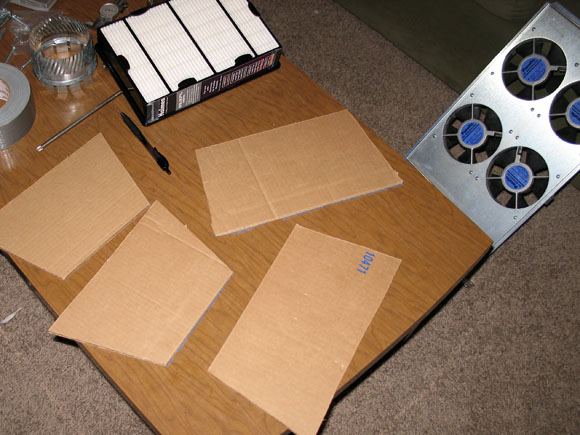

I started by cutting four pieces of cardboard (out of a Dell box, as it turned out) to make the faces of a kind of trapezoidal solid which would connect the fan tray at the wider end to the filter at the narrow end. Duct tape held the shape together with a pretty tight friction-fit on the filter, which I then sealed in with more tape.
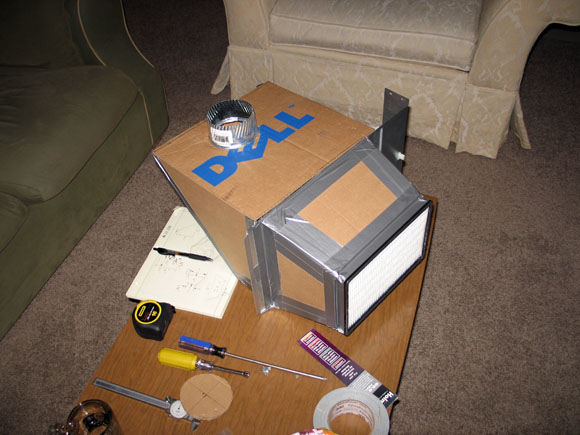
On the opposide side of the fan tray I taped together a triangular prism shape out of more cardboard segments. On one face I cut a circular hole for a flange-like fitting that would accept the end of the dryer duct.
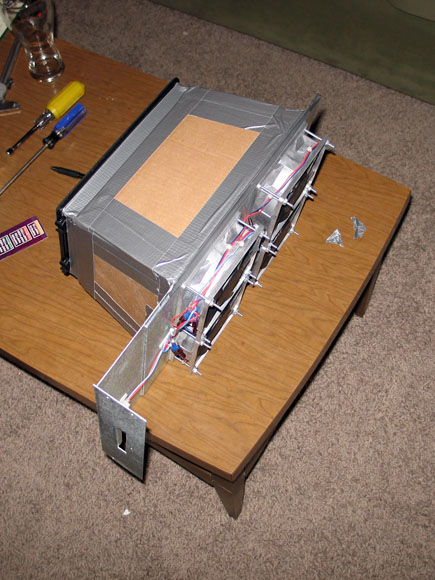
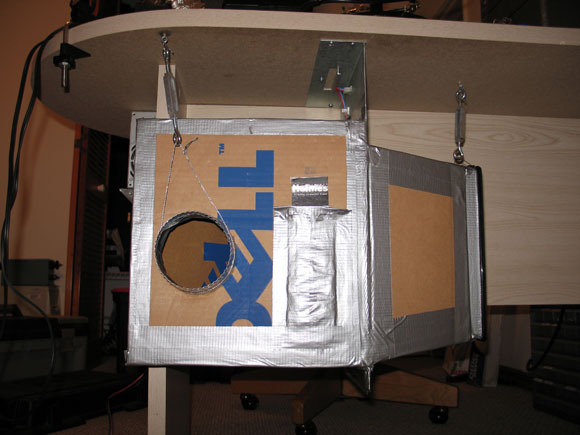
Completed fan and manifold assembly, with pocket for filter identification
Planning much further into the future than was really warranted, I also made a little pocket out of duct tape to hold the side of the box the HEPA filter came in, so that I could identify it if I ever needed to get a replacement filter. With that touch the main part of the extractor was finished and I stopped work for the night.
Power Supply
I know it looks like I should grommet that, but the edge of the hole is rolled and was never grommeted in the first place
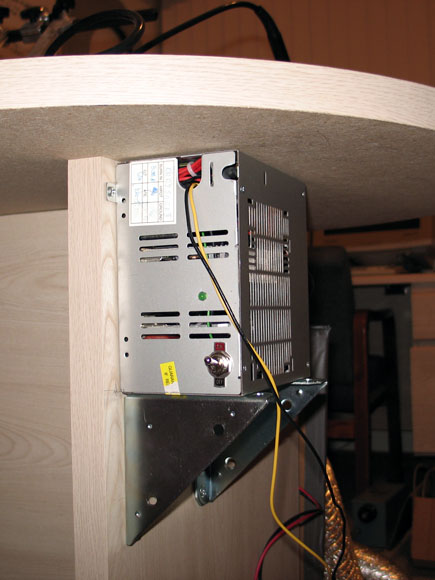
I wanted to dedicate a 12-volt power supply to the fume extractor rather than using a bench supply to power it; naturally I dug into my stack of ATX power supplies and selected a likely candidate for converting to standalone operation. There's plenty of pages and videos on the Internet detailing exactly how to do this but I like the instructions from Andy Batts at Murray State University. This part is optional, but I equipped mine with an indicator LED wired to the PWR_OK signal (grey wire)
The fan assembly came with a two-pin power inlet (the type commonly known as a “molex connector”). To extend power to it from the PSU, I spliced some extra wire to the 12 volt and return leads (yellow and black) and finished the end with the complementary connector pins and housing. To make the installation look nice I placed the PSU under one side of the work table on two right-angle brackets and screwed it to the table leg using the power supply's only mounting tab, which proved to be secure enough.
Arm Wrestling
Since I wanted to mount the extractor itself under the worktable, I needed a way to position the end of the dryer duct over my soldering area, preferably with some kind of adjustment so that I could move it out of my way when necessary.

Swing-arm lamp minus its lampshade and barely-adequate table clamp
Bulb-end of the lamp with wrist joint
I selected a cheap Staples store brand lamp and set to work removing the business end from the arm so that I could attach the duct in its place. Although I prefer never to cut out components when I'm disassembling something, in this case I was forced to do just that to remove the lamp socket. I left the segment of lamp cord threaded through the arm tubes, though—it seemed like a good idea to be able to run power to the end of this thing if I ever wanted to outfit the end of the duct with its own fan or with LED task lights, etc.
The arm is attached to a cylindrical housing for the lamp socket through a last joint that might be called a wrist; this joint ends in a concave surface that matches the radius of the housing and has two mounting holes for screws. I wanted to use this same joint to attach a sheet metal duct fitting to the arm to serve as a fume collector; the dryer duct could hang from the back of the fitting secured by a hose clamp. However, the duct fitting had a much larger radius than the original lamp housing, so the concave wrist joint wouldn't sit very securely on it. For a solution I turned to my second favorite (after duct tape itself!) prototyping material: plumber's epoxy putty.
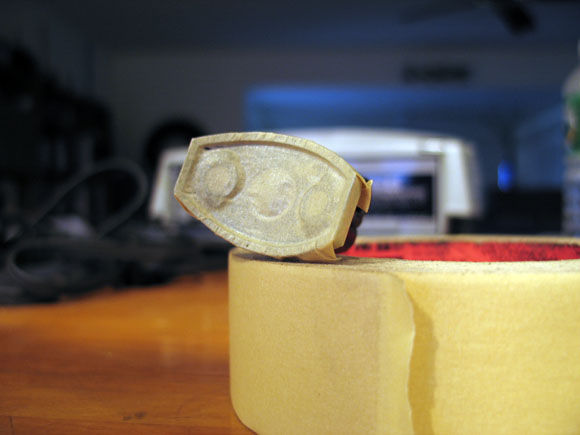
Masking tape as a mold-release
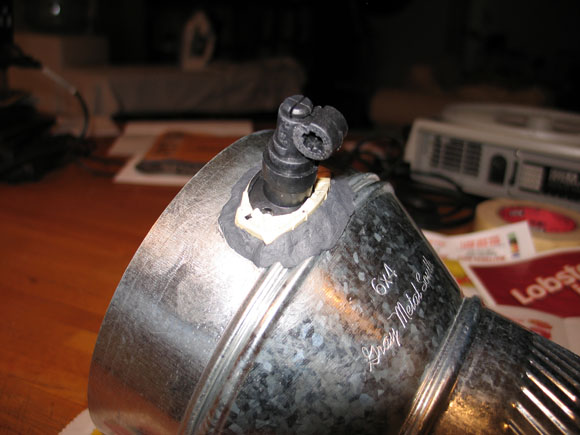
The wrist in place while the putty cures
My plan was to apply some of the putty to the fitting, then press the surface of the wrist joint into the resulting blob to leave an impression that would have the correct radius. Reasoning that I might someday want to convert the arm back into a lamp (or maybe just use the lampshade as the end of the duct instead), I covered the mating surface of the wrist joint with masking tape before pressing it into the epoxy putty so I'd be molding a seat for it rather than just sticking it directly to the duct. Once it was cured I drilled through the putty and duct to match the mounting holes on the joint, and used machine screws with nuts to hold it all together.
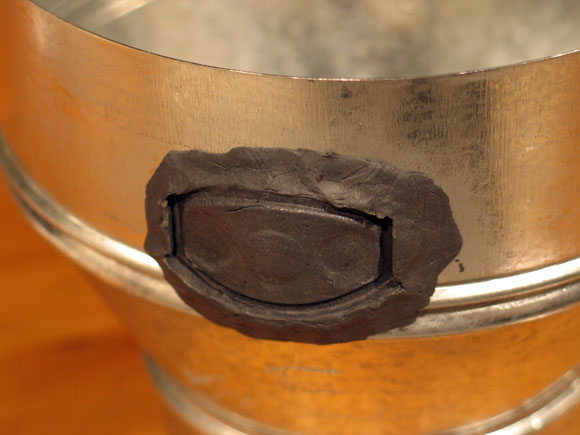
Seating surface after molding
A Disappointing Result
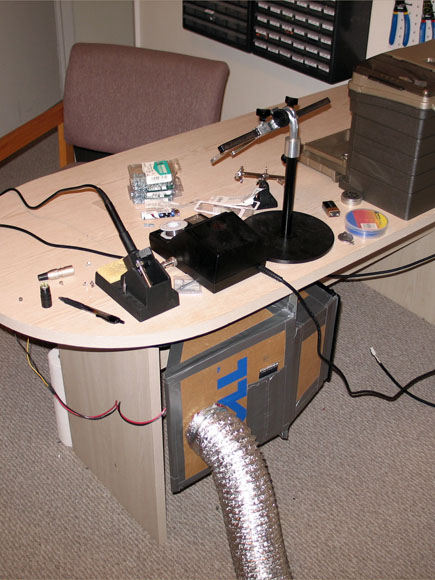
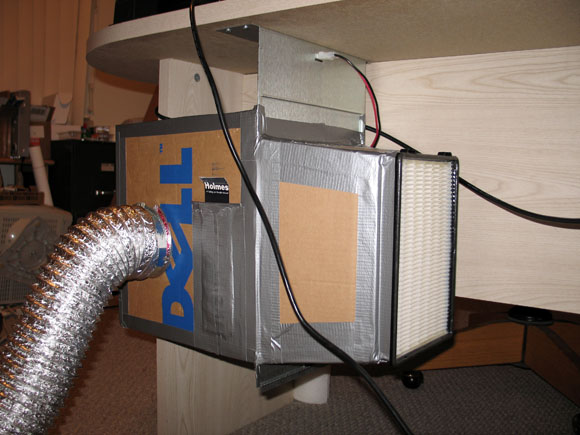
With the arm assembly completed, I set up the entire apparatus, eager to see it in action. The extractor I mounted under the work table (on the side opposite of where I sit), hanging it from the steel flange of the fan assembly. I clamped the arm's base to the right side of the table and hooked up the flexible dryer duct from the arm to the fan box with hose clamps at both ends. After connecting the power inlet to the PSU, I flipped the toggle switch and starting melting solder.
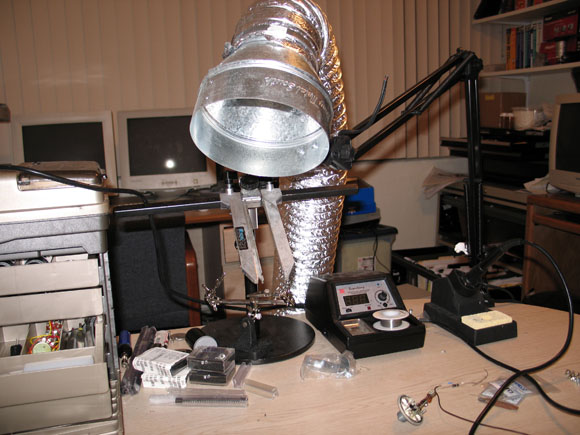
Business end of the extractor, poised over PCB vise
The whole apparatus worked but the result was less than impressive. Those four fans could indeed pull a thin laminar stream of smoke from the soldering iron into the duct, but for this to happen the yawning mouth of the thing had to be looming directly above, and very close to, whatever I was soldering. Although it worked under those conditions and was certainly quiet enough, the sad truth was that the extractor needed quite a bit more power to really do the job. And still worse was to come.
Structural Failure
A few weeks after I installed the device, both of the box-like constructions taped to the fan tray started to sag. I pushed them back into place and added some more tape, but only got a few more weeks of use out of the thing before it came apart entirely.
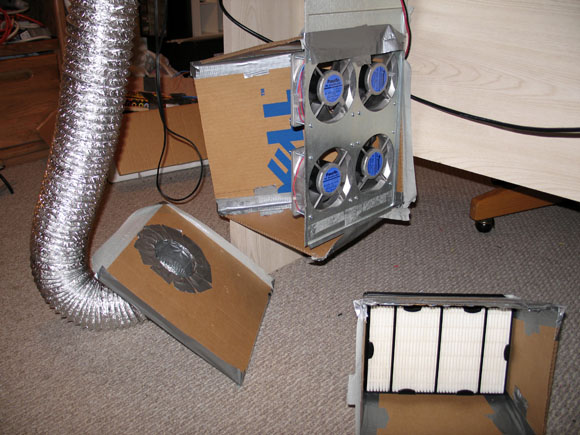
Trying to save what was pretty obviously a lost cause, I taped the boxes up again and then used very light wire rope to suspend both ends of the assembly, by looping wire around the filter and around the duct inlet. I used turnbuckles at both ends so that I could fiddle with the tension. Predictably though, the boxes just ended up coming loose from the fan tray and falling apart anyway, at which point I gave up—the fume extractor didn't really work well enough anyway.
Lessons Learned
As promised at the beginning of this tale of woe, here is some of the broadly-applicable knowledge that finally precipated out of my mind after working on this project and seeing it fail:
- The long-term hold of duct tape on cardboard is not as great as you'd expect. But then, it's well known that duct tape isn't actually any good for ductwork and isn't much used for it anymore.
- You always need more power than you think.
- I continue to be impressed with the properties of epoxy putty. The molding technique I used to get the duct secured to the lamp arm seems like it could be useful for other projects; I'll keep it in mind.
- Don't throw good effort after bad, like I did with the cable support system. It should have been clear that a clean sheet of paper was called for at that point.
Well, live and learn!