Make your playground musical with this interactive project.
The Musical Swings
with Gemma Ward
and Melissa Norelli Hassan
February 2017
Contents
For More on this Project
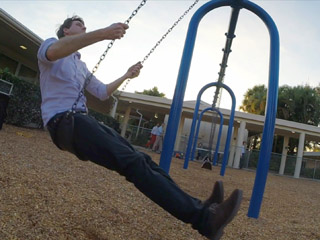
Cultural life in downtown West Palm Beach was considerably enlivened for a short period last year when a vacant lot on Clematis Street hosted a traveling exhibition titled The Swings. This interactive art project is a swingset with nine seats, each of which triggers a different set of sounds when a person swings on them. The result of nine people swinging at once can be a sort of a collaborative musical performance.
Inspired by this, a motivated student, Gemma Ward, and her teacher, Melissa Norelli Hassan, of Delray Beach's Unity School wanted to reproduce the project with their school's own playground swingset, and experiment with how cooperating to make interactive art can have a psychological effect on those using the swings. Mrs. Hassan was one of my students in last year's Introduction to 3D Design class at Hacklab North Boynton and thought I might be able to help them realize their project, which we would debut at Unity School's Future Scientists and Engineers Conference on February 23, 2017.
They proposed that Gemma would create the software using the Scratch visual programming environment if I could figure out a way to capture the action of the swing and provide input to Scratch. I did a bit of research and discovered a project named S4A, or Scratch 4 Arduino, that uses an Arduino with S4A's firmware to act as an intermediary between the physical world and Scratch code running on a PC. With S4A running the Arduino reads its inputs continuously and sends values up the USB connection to the PC, and listens for values sent by the PC with which it updates its outputs.
The original traveling installation was a custom-made set of rigid-arm swings, which simplifies sensing their motion somewhat: since they are confined to moving on a plane, it's easy to detect angle by, say, optical methods or Hall-effect sensors without needing to worry about the arm crashing into anything. But at Unity School we had an ordinary set of eight identical swings on chains, which permit twisting and out-of-plane motion. So I decided to detect swinging with an old favorite of mine: solid-state accelerometers.
Sensor Pods
Given that I could easily read up to five ADCs using S4A, it made sense to buy some accelerometer breakout boards that provide acceleration signals as analog voltage levels. I chose Adafruit's ADXL335 board, using the Analog Devices chip of the same part number, which also includes a LDO regulator so that it can accept 5V power. Sparkfun has a similar product without the LDO.
A simple test of the accelerometer in Scratch. This is almost identical to one of S4A's tutorial examples.
We could measure eight swings at once with two Arduinos, each positioned on top of the swing beam in the center of the four swings it serves. Some simple tests with the ADXL335 and an eight foot length of flat four-conductor telephone cable revealed that the analog signal could travel the worst-case distance from the farthest swing to the Arduino. Then we would need two laptops, positioned at the opposite ends of the swingset, and communicating with one Arduino each via USB.
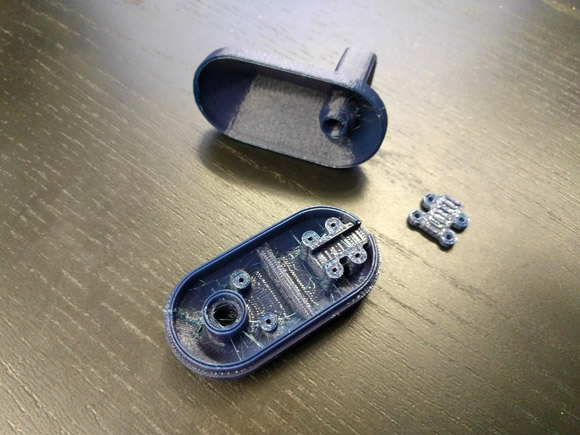
Three components of the accelerometer pod
To attach the accelerometers to the swing chains in a robust way, I designed a small plastic pod with a boss extending through a link of the chain and secured with a 1/4-20 bolt. We 3d-printed these pods on Unity School's Makerbots. Although I use Solidworks in my day job, to make this design more accessible to others I built it in Onshape, the free in-the-browser CAD system I taught in the Introduction to 3D Design course. Here are links to the public Onshape files and resulting STLs:
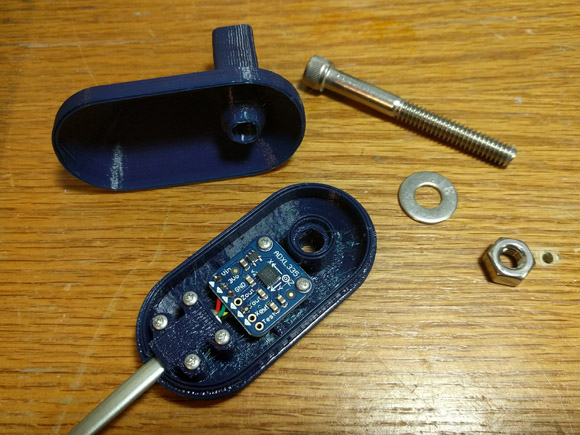
Accelerometer pod with ADXL335 board and strain relief installed
I soldered four-conductor flat telephone cable to the ADXL335 board, passed this through a rectangular channel in the enclosure, and used small threadforming screws to hold down the PCB and a strain-relief block that also came from the 3D printer. Notice that we use only the y-axis measurement in this application, so we don't need to solder to all of the pins of the breakout board.
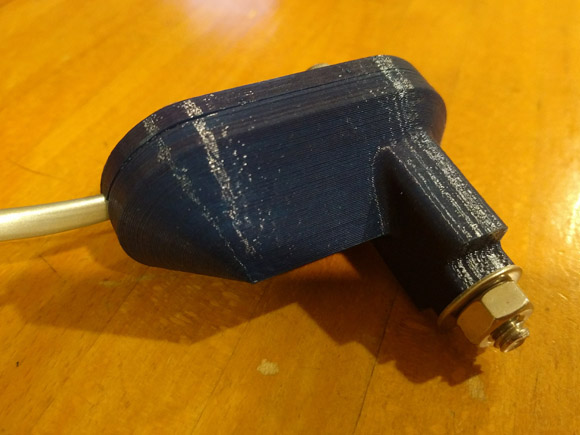
Fully assembled enclosure with chain bolt
Arduino Hubs
Four pods connect to each of two Arduino Uno boards, via Cat5 ethernet cable and modular connectors. Short on time, and needing a somewhat robust way to mount and protect the boards and associated connections, I turned to my laser cutter and designed an enclosure, again in Onshape, to be cut out of birch plywood and assembled with tab-and-slot techniques. You can download 3D files for that below, along with a 2D drawing to give to a laser cutter; please note that I made some modifications directly to the 2D drawing; these modifications make up the difference between front and back plates which I haven't captured in 3D.
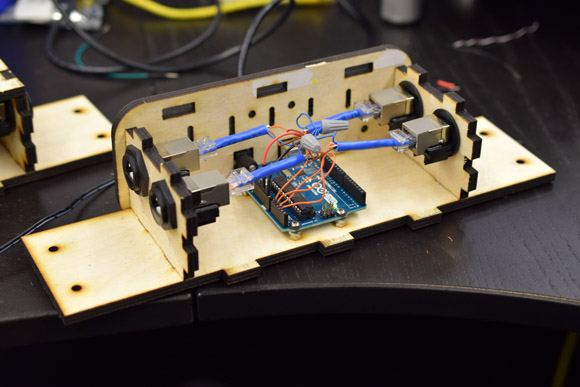
An Arduino, crudely wired inside its enclosure
I installed the Uno boards inside the plywood enclosures and wired them to bulkhead-style RJ-45 connectors that I had left over from another project (luckily, because those things aren't cheap!). The USB and power jacks of the Arduino are accessible through rectangular slots in the back panel of the enclosure.
To mount this on top of the swingset, I made some plywood stands that bolt to the bottom of the enclosure and can be zip-tied to the round beam of the swingset. Those stands have a radius on the bottom that matches the five-inch diameter of the beam.
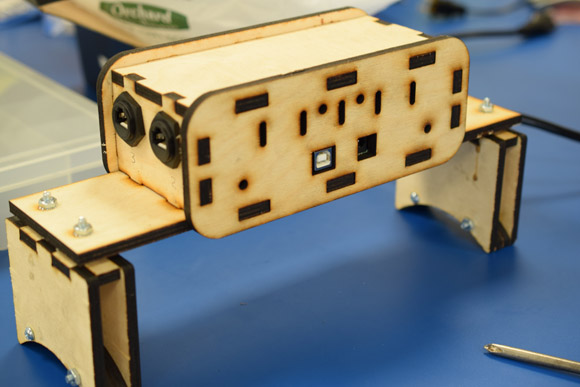
Back of the enclosure, with Arduino connectors
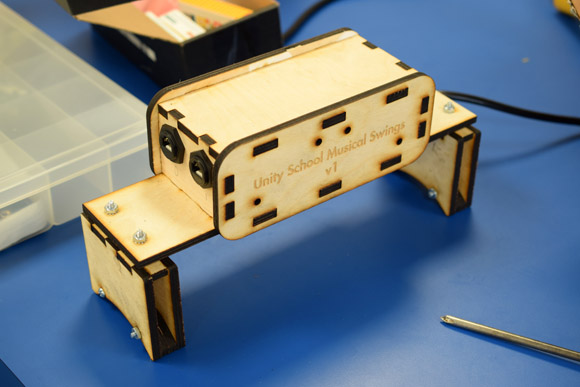
Front of the enclosure, with stands
To connect the accelerometer pods to the RJ45 ports on the Arduino enclosure, I made some cables from more category-5 modular cable with a RJ45 plug on the Arduino end and a RJ11 plug on the other, which I'd connect to an inline coupler. Those couplers I attached with double-sided tape to cable mounts made from more laser-cut plywood. Like the enclosure stands, these were designed in Onshape and have a radius that engages with the swingset beam. Because the enclosure stands and cable mounts are identical except for height, I designed them in the same Onshape document, but the vector outputs are separate:
- Arduino enclosure stands and cable mounts, Onshape document
- Arduino enclosure stands, vector drawing
- Cable mounts, vector drawing
Installation
On the day of the conference I went to Unity School early and started installing everything. That meant bolting the pods to one chain on each of eight swings, zip-tying the Arduino enclosures and cable mounts on top of the beam, and cabling everything. Laptops we placed on tables at each end of the swingset, connected to the Arduinos via 20-foot-long active USB extension cables. I also extended the output cables of 12V 2A wall-wart power supplies to provide more than enough power to the Arduinos. We connected the headphone outputs of the laptops to a powerful multi-channel audio amplifier and speaker loud enough to fill a crowded playground.
Cables and sensor installed on swing.
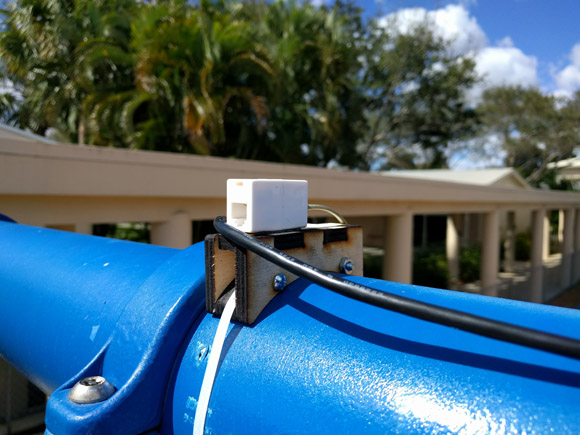
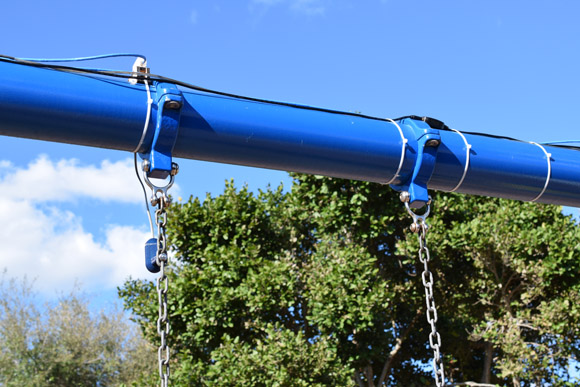
Cable mount installed on swingset. The heavy black cable is USB.

Arduino enclosure installed over center support of swingset.
We installed the Arduino enclosures in the center of each four-swing cluster. Because the swingset beam is supported in this location via a sort of connector around the five-inch pipe, I made the enclosure stands tall enough so that the enclosure could sit above.
A Swinging Party
With everything wired and responding correctly, Gemma's software would strike notes when the swing angle with the vertical exceeded some threshold, with different swings associated with different instruments.
Happy kids (and one happy engineer) playing on the musical swings.
We've had some ideas for future improvements, both to the technology and to its artistic uses. Since the values returned to Scratch are analog levels proportional to angle it is possible for future experiments to expand on this effort by, for instance, controlling the pitch or volume of the notes; higher swinging could mean louder or higher-pitched sounds. It should also be possible, and may enhance the feeling of collaboration, to have the results of each swing influenced by the action of neighboring swings in some satisfying way, perhaps by triggering additional notes.
Finally, I'd like to thank the Unity School, Melissa Norelli Hassan, and Gemma Ward for the opportunity to work on such a fun project!